Android底部导航栏实现(四)之TabLayout+ViewPager
这里简单记录一下通过TabLayout+ViewPager来实现Android底部导航栏。
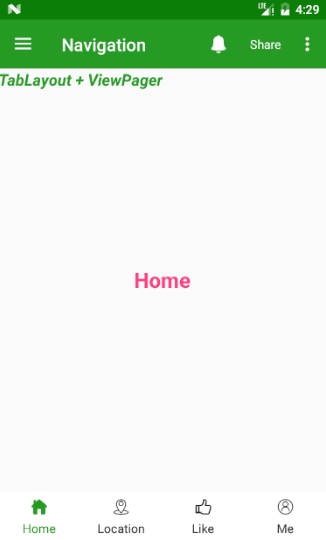

布局
1
2
3
4
5
6
7
8
9
10
11
12
13
14
15
16
17
18
19
20
21
22
23
24
25
26
27
28
29
30
31
32
| <?xml version="1.0" encoding="utf-8"?>
<RelativeLayout xmlns:android="http://schemas.android.com/apk/res/android"
xmlns:app="http://schemas.android.com/apk/res-auto"
android:layout_width="match_parent"
android:layout_height="match_parent"
android:orientation="vertical">
<include layout="@layout/fragment_content"/>
<LinearLayout
android:layout_width="match_parent"
android:layout_height="match_parent"
android:orientation="vertical">
<android.support.v4.view.ViewPager
android:id="@+id/view_pager"
android:layout_width="match_parent"
android:layout_height="0dp"
android:layout_weight="1"></android.support.v4.view.ViewPager>
<android.support.design.widget.TabLayout
android:id="@+id/tab_layout"
android:layout_width="match_parent"
android:layout_height="56dp"
app:tabBackground="@color/white"
app:tabIndicatorHeight="0dp"
app:tabSelectedTextColor="@color/colorPrimary"
app:tabTextAppearance="@style/tabTextSizeStyle"
app:tabTextColor="@color/black_1"></android.support.design.widget.TabLayout>
</LinearLayout>
</RelativeLayout>
|
代码
1
2
3
4
5
6
7
8
9
10
11
12
| mViewPager = (ViewPager) view.findViewById(R.id.view_pager);
mTabLayout = (TabLayout) view.findViewById(R.id.tab_layout);
initTabList();
mAdapter = new TabLayoutFragmentAdapter(getChildFragmentManager(), mTabList, getActivity(), mFragments, mTabImgs);
mViewPager.setAdapter(mAdapter);
mViewPager.setCurrentItem(0);
mTabLayout.setupWithViewPager(mViewPager);
mTabLayout.setTabMode(TabLayout.MODE_FIXED);
for (int i = 0; i < mTabLayout.getTabCount(); i++) {
mTabLayout.getTabAt(i).setCustomView(mAdapter.getTabView(i));
}
mTabLayout.addOnTabSelectedListener(this);
|
这里需要注意的就是TabLayout的使用。TabLayou配合ViewPager使用。要用 mTabLayout.setupWithViewPager(mViewPager);使二者联系起来。
另外这里面使用的是customView,当然TabLayout自带方法也可实现icon+text的效果。也就是效果:TabLayout + ViewPager 2
根据Tab选中状态显示Tab键效果
1
2
3
4
5
6
7
8
9
10
11
12
13
14
15
16
17
18
19
20
21
22
23
24
25
26
27
28
29
30
31
32
33
34
35
36
37
38
39
40
41
42
43
44
45
46
47
48
49
50
51
52
| @Override
public void onTabSelected(TabLayout.Tab tab) {
setTabSelectedState(tab);
}
@Override
public void onTabUnselected(TabLayout.Tab tab) {
setTabUnSelectedState(tab);
}
@Override
public void onTabReselected(TabLayout.Tab tab) {
}
private void setTabSelectedState(TabLayout.Tab tab) {
View customView = tab.getCustomView();
TextView tabText = (TextView) customView.findViewById(R.id.tv_tab_text);
ImageView tabIcon = (ImageView) customView.findViewById(R.id.iv_tab_icon);
tabText.setTextColor(ContextCompat.getColor(getActivity(), R.color.colorPrimary));
String s = tabText.getText().toString();
if (getString(R.string.item_home).equals(s)) {
tabIcon.setImageResource(R.drawable.home_fill);
} else if (getString(R.string.item_location).equals(s)) {
tabIcon.setImageResource(R.drawable.location_fill);
} else if (getString(R.string.item_like).equals(s)) {
tabIcon.setImageResource(R.drawable.like_fill);
} else if (getString(R.string.item_person).equals(s)) {
tabIcon.setImageResource(R.drawable.person_fill);
}
}
private void setTabUnSelectedState(TabLayout.Tab tab) {
View customView = tab.getCustomView();
TextView tabText = (TextView) customView.findViewById(R.id.tv_tab_text);
ImageView tabIcon = (ImageView) customView.findViewById(R.id.iv_tab_icon);
tabText.setTextColor(ContextCompat.getColor(getActivity(), R.color.black_1));
String s = tabText.getText().toString();
if (getString(R.string.item_home).equals(s)) {
tabIcon.setImageResource(R.drawable.home);
} else if (getString(R.string.item_location).equals(s)) {
tabIcon.setImageResource(R.drawable.location);
} else if (getString(R.string.item_like).equals(s)) {
tabIcon.setImageResource(R.drawable.like);
} else if (getString(R.string.item_person).equals(s)) {
tabIcon.setImageResource(R.drawable.person);
}
}
|
这里面不用设置defaultFragment,TabLayout会默认显示第一个;
另外,这里也贴出使用TabLayout自带方法来实现效果代码
值得说的是,自带方法不能自定义icon和text的间距。用起来很方便,但是可能不是你要求的那个尺寸大小。我没有去深究这里面的源码。
如果有人知道这个自带方法怎么改变的,也请告知一下。
1
2
3
4
5
6
7
8
9
10
11
12
13
14
15
16
17
| mViewPager = (ViewPager) view.findViewById(R.id.view_pager);
mTabLayout = (TabLayout) view.findViewById(R.id.tab_layout);
initTabList();
mAdapter = new TabLayoutFragment2Adapter(getChildFragmentManager(), mTabList, getActivity(), mFragments, mTabImgs);
mViewPager.setAdapter(mAdapter);
mViewPager.setCurrentItem(0);
mTabLayout.setupWithViewPager(mViewPager);
mTabLayout.setTabMode(TabLayout.MODE_FIXED);
mTabLayout.addOnTabSelectedListener(this);
mTabLayout.getTabAt(0).setIcon(R.drawable.home_fill);
mTabLayout.getTabAt(1).setIcon(R.drawable.location);
mTabLayout.getTabAt(2).setIcon(R.drawable.like);
mTabLayout.getTabAt(3).setIcon(R.drawable.person);
|
Tab切换
1
2
3
4
5
6
7
8
9
10
11
12
13
14
15
16
17
18
19
20
21
22
23
24
25
26
27
28
29
30
| @Override
public void onTabSelected(TabLayout.Tab tab) {
resetTabIcon();
int position = tab.getPosition();
Log.e("Kevin", "position--->" + position);
switch (position) {
case 0:
tab.setIcon(R.drawable.home_fill);
break;
case 1:
tab.setIcon(R.drawable.location_fill);
break;
case 2:
tab.setIcon(R.drawable.like_fill);
break;
case 3:
tab.setIcon(R.drawable.person_fill);
break;
}
}
private void resetTabIcon() {
mTabLayout.getTabAt(0).setIcon(R.drawable.home);
mTabLayout.getTabAt(1).setIcon(R.drawable.location);
mTabLayout.getTabAt(2).setIcon(R.drawable.like);
mTabLayout.getTabAt(3).setIcon(R.drawable.person);
}
|
说明:这几篇文章没有过多的文字叙述,因为这些东西也不是很难,而且都是常用的,相信很多人都了如指掌了,多说亦是废话,直接上代码看的反而更清楚。

