众所周知,目的前的第三方推送很多。这里简单记录下极光集成。
其实没啥可写的,直接根据官方文档一步步集成即可。
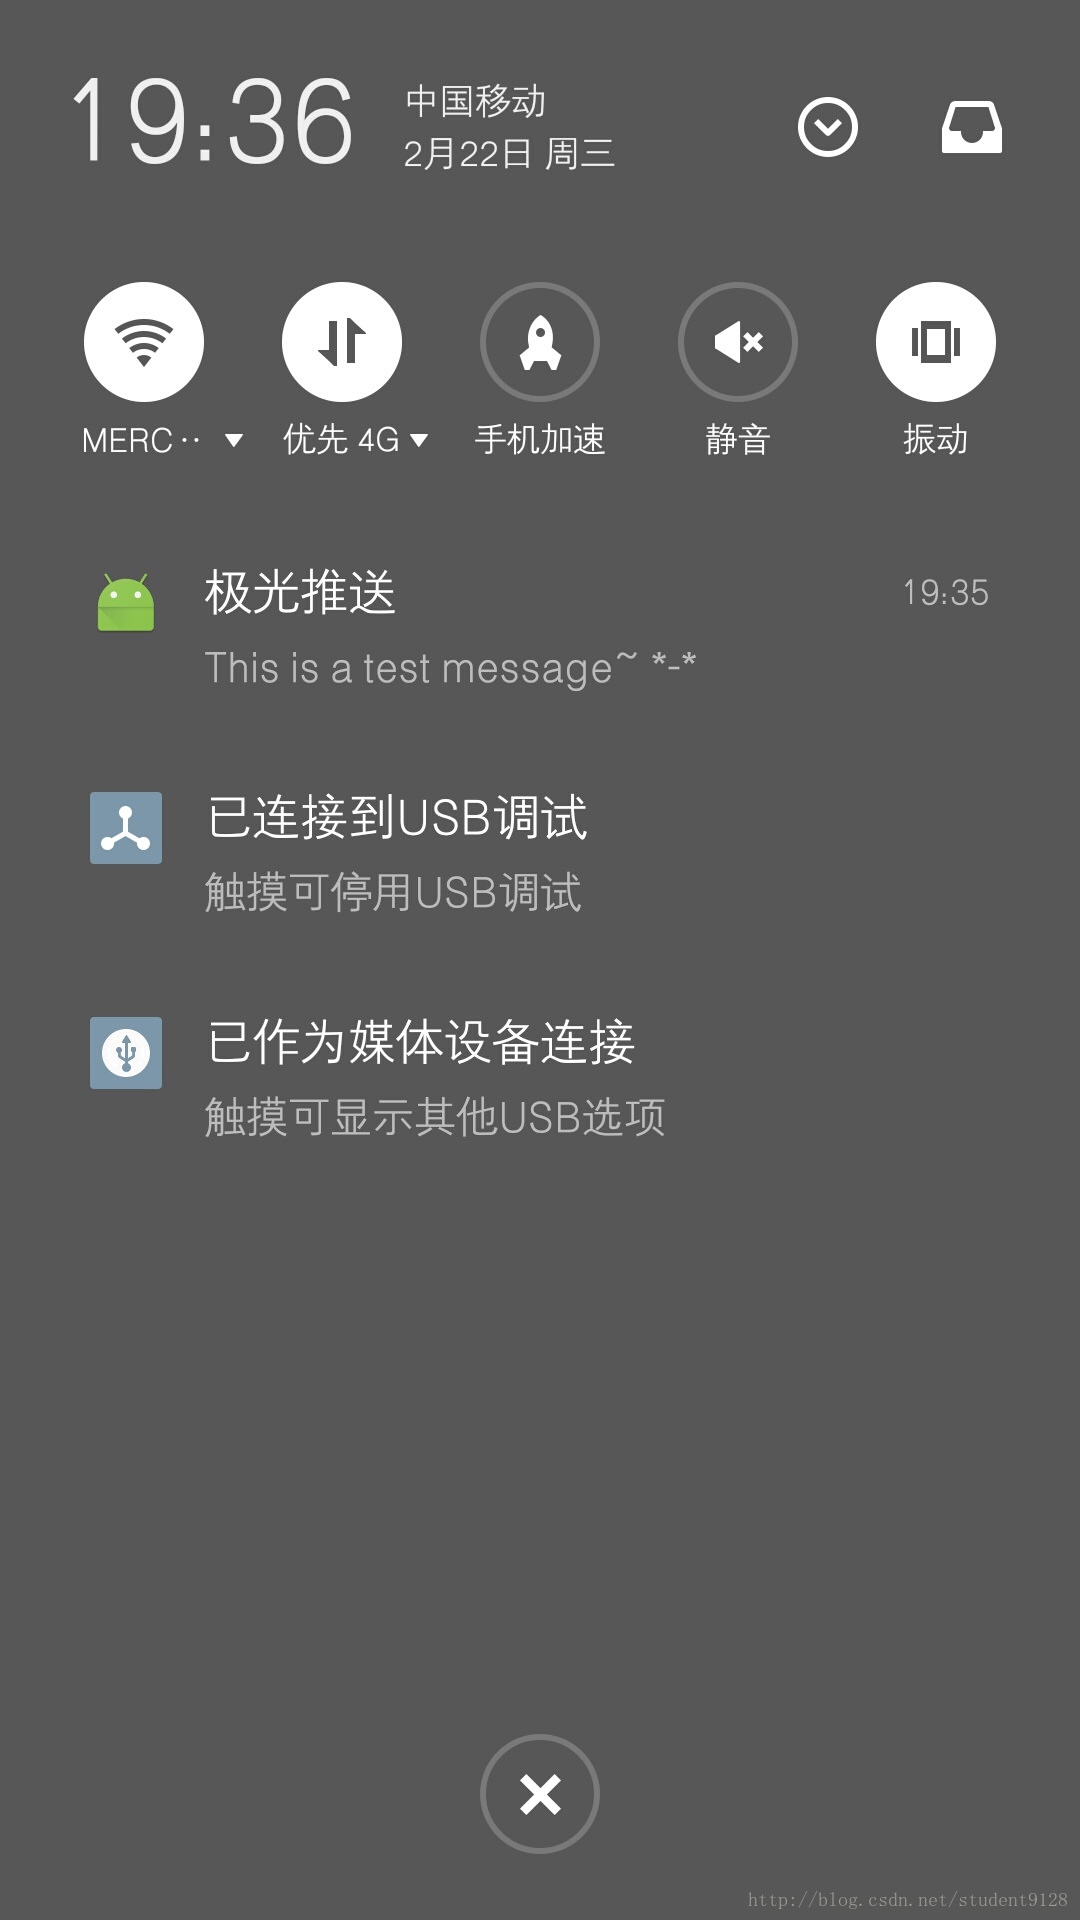
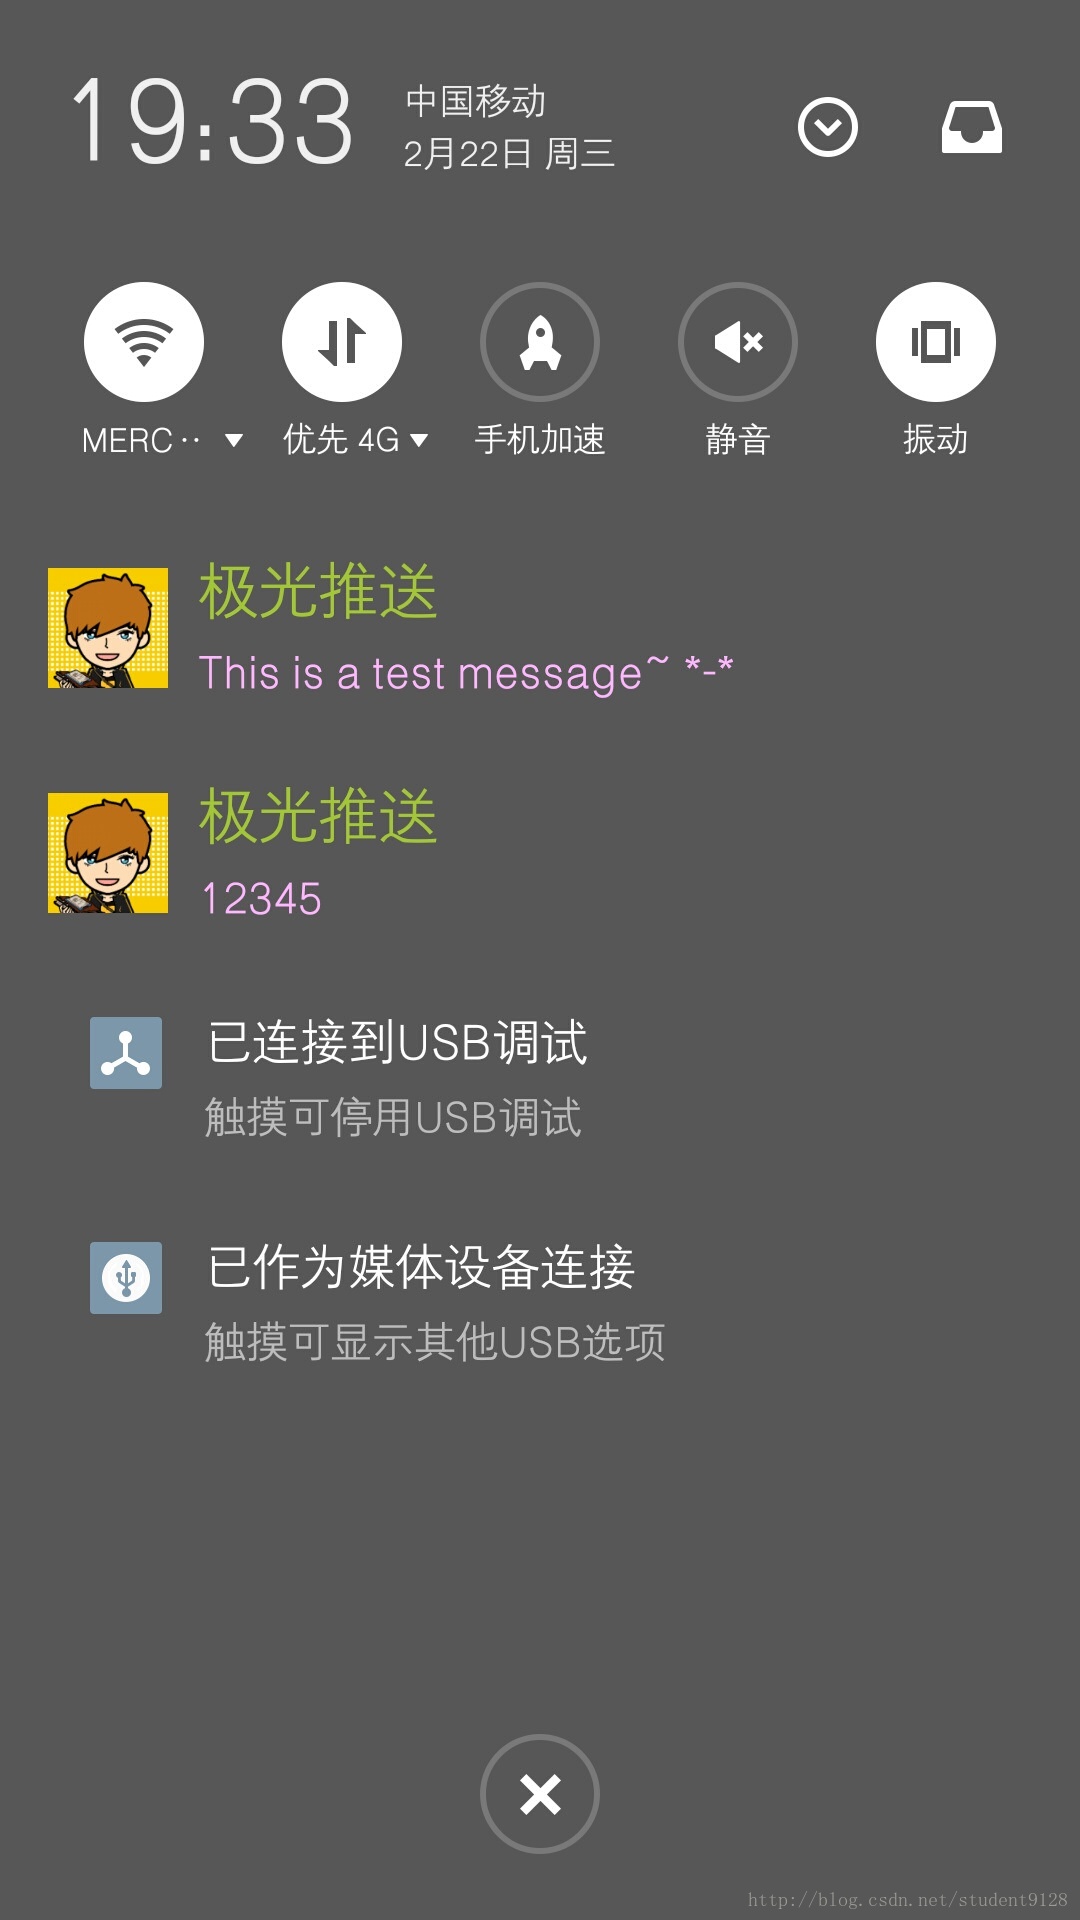
效果图
跟众多第三方的使用一样,首先要参考官方文档

简单集成
在AndroidStudio中创建好Project。
去开发者平台(注册好账号),创建自己的应用,当应用创建好之后,我们可以按照官方文档一步一步的进行集成,复制粘贴所需的jar包,so等文件。
集成的话,我们会发现,当
极光后台创建好应用时,会发现在获得AppKey的同时,下面有个下载Demo

这里点击下载,然后将类,清单文件里面的东西复制粘贴进自己的工程即可,这是最快速的集成。当然里面的代码还有自己精简下,因为有些是我们开发中不需要的
这样运行之后就可以实现推送了。当然也可以按照文档一步一步的来集成。
清单文件配置
将’您应用的包名’换成你自己的包名即可
在最后添加上自己的AppKey
1
2
3
4
5
6
7
8
9
10
11
12
13
14
15
16
17
18
19
20
21
22
23
24
25
26
27
28
29
30
31
32
33
34
35
36
37
38
39
40
41
42
43
44
45
46
47
48
49
50
51
52
53
54
55
56
57
58
59
60
61
62
63
64
65
66
67
68
69
70
71
72
73
74
75
76
77
78
79
80
81
82
83
84
85
86
87
88
89
90
91
92
93
94
95
96
97
98
99
100
101
102
103
104
105
106
107
108
109
110
111
112
113
114
115
116
117
118
119
120
121
122
123
124
125
126
127
128
129
130
131
132
133
134
135
136
137
|
<?xml version="1.0" encoding="utf-8"?>
<manifest xmlns:android="http://schemas.android.com/apk/res/android"
package="您应用的包名"
>
<permission
android:name="您应用的包名.permission.JPUSH_MESSAGE"
android:protectionLevel="signature" />
<uses-permission android:name="您应用的包名.permission.JPUSH_MESSAGE" />
<uses-permission android:name="android.permission.RECEIVE_USER_PRESENT" />
<uses-permission android:name="android.permission.INTERNET" />
<uses-permission android:name="android.permission.WAKE_LOCK" />
<uses-permission android:name="android.permission.READ_PHONE_STATE" />
<uses-permission android:name="android.permission.WRITE_EXTERNAL_STORAGE" />
<uses-permission android:name="android.permission.READ_EXTERNAL_STORAGE" />
<uses-permission android:name="android.permission.VIBRATE" />
<uses-permission android:name="android.permission.MOUNT_UNMOUNT_FILESYSTEMS" />
<uses-permission android:name="android.permission.ACCESS_NETWORK_STATE" />
<uses-permission android:name="android.permission.WRITE_SETTINGS" />
<uses-permission android:name="android.permission.ACCESS_WIFI_STATE" />
<uses-permission android:name="android.permission.SYSTEM_ALERT_WINDOW" />
<uses-permission android:name="android.permission.ACCESS_COARSE_LOCATION" />
<uses-permission android:name="android.permission.CHANGE_WIFI_STATE" />
<uses-permission android:name="android.permission.ACCESS_FINE_LOCATION" />
<uses-permission android:name="android.permission.ACCESS_LOCATION_EXTRA_COMMANDS" />
<uses-permission android:name="android.permission.CHANGE_NETWORK_STATE" />
<uses-permission android:name="android.permission.GET_TASKS" />
<application
android:icon="@drawable/ic_launcher"
android:label="@string/app_name"
android:name="Your Application Name">
<service
android:name="cn.jpush.android.service.PushService"
android:enabled="true"
android:exported="false" >
<intent-filter>
<action android:name="cn.jpush.android.intent.REGISTER" />
<action android:name="cn.jpush.android.intent.REPORT" />
<action android:name="cn.jpush.android.intent.PushService" />
<action android:name="cn.jpush.android.intent.PUSH_TIME" />
</intent-filter>
</service>
<service
android:name="cn.jpush.android.service.DaemonService"
android:enabled="true"
android:exported="true">
<intent-filter >
<action android:name="cn.jpush.android.intent.DaemonService"/>
<category android:name="您应用的包名"/>
</intent-filter>
</service>
<receiver
android:name="cn.jpush.android.service.PushReceiver"
android:enabled="true" >
<intent-filter android:priority="1000">
<action android:name="cn.jpush.android.intent.NOTIFICATION_RECEIVED_PROXY" />
<category android:name="您应用的包名"/>
</intent-filter>
<intent-filter>
<action android:name="android.intent.action.USER_PRESENT" />
<action android:name="android.net.conn.CONNECTIVITY_CHANGE" />
</intent-filter>
<intent-filter>
<action android:name="android.intent.action.PACKAGE_ADDED" />
<action android:name="android.intent.action.PACKAGE_REMOVED" />
<data android:scheme="package" />
</intent-filter>
</receiver>
<activity
android:name="cn.jpush.android.ui.PushActivity"
android:configChanges="orientation|keyboardHidden"
android:theme="@android:style/Theme.NoTitleBar"
android:exported="false" >
<intent-filter>
<action android:name="cn.jpush.android.ui.PushActivity" />
<category android:name="android.intent.category.DEFAULT" />
<category android:name="您应用的包名" />
</intent-filter>
</activity>
<service
android:name="cn.jpush.android.service.DownloadService"
android:enabled="true"
android:exported="false" >
</service>
<receiver android:name="cn.jpush.android.service.AlarmReceiver" />
<receiver
android:name="您自己定义的Receiver"
android:enabled="true">
<intent-filter>
<action android:name="cn.jpush.android.intent.REGISTRATION" />
<action android:name="cn.jpush.android.intent.MESSAGE_RECEIVED" />
<action android:name="cn.jpush.android.intent.NOTIFICATION_RECEIVED" />
<action android:name="cn.jpush.android.intent.NOTIFICATION_OPENED" />
<action android:name="cn.jpush.android.intent.CONNECTION" />
<category android:name="您应用的包名" />
</intent-filter>
</receiver>
<meta-data android:name="JPUSH_CHANNEL" android:value="developer-default"/>
<meta-data android:name="JPUSH_APPKEY" android:value="您应用的Appkey"/>
</application>
</manifest>
|
混淆:
在proguard文件中添加如下代码
1
2
3
4
5
6
7
8
9
10
11
12
13
14
|
-dontoptimize
-dontpreverify

-dontwarn cn.jpush.**
-keep class cn.jpush.** { *; }

-dontwarn cn.jiguang.**
-keep class cn.jiguang.** { *; }

#==================gson && protobuf==========================
-dontwarn com.google.**
-keep class com.google.gson.** {*;}
-keep class com.google.protobuf.** {*;}
|
JPush初始化
1
2
3
4
5
6
7
8
9
10
11
12
13
14
|
public class BaseApplication extends Application{
private static final String TAG = "JPush";
@Override
public void onCreate() {
Log.d(TAG, "[BaseApplication] onCreate");
super.onCreate();
JPushInterface.setDebugMode(true);
JPushInterface.init(this);
}
|
自定义通知栏样式
注意:通过对比可以发现,自定义样式的通知栏没有时间,默认的是有时间的(信鸽推送自定义的是有时间的,这一点我喜欢信鸽的,其他效果反正都一样,何必给自己找trouble)。
这是极光推送的问题,我们只能通过用自定义消息(其他推送里面的透传消息),然后再将自定义消息发送到自己写的Notification来展示。
1
2
3
4
5
6
7
8
9
10
11
12
13
14
15
16
17
18
19
20
21
22
23
24
25
26
27
28
29
30
31
32
33
34
35
36
37
|
private void customizeNotification() {
CustomPushNotificationBuilder builder = new
CustomPushNotificationBuilder(MainActivity.this,
R.layout.customer_notitfication_layout_one,
R.id.m_icon,
R.id.m_title,
R.id.m_text);
builder.statusBarDrawable = R.drawable.ic_ico;
builder.layoutIconDrawable = R.drawable.ic_ico;
builder.notificationFlags = Notification.FLAG_AUTO_CANCEL
| Notification.FLAG_SHOW_LIGHTS;
builder.notificationDefaults = Notification.DEFAULT_SOUND
| Notification.DEFAULT_VIBRATE
| Notification.DEFAULT_LIGHTS;
JPushInterface.setDefaultPushNotificationBuilder(builder);
}
|
广播
在相应的地方做我们需要的操作即可
1
2
3
4
5
6
7
8
9
10
11
12
13
14
15
16
17
18
19
20
21
22
23
24
25
26
27
28
29
30
31
32
33
34
35
36
37
38
39
40
41
42
43
44
45
|
public class MyReceiver extends BroadcastReceiver {
private static final String TAG = "JPush";
@Override
public void onReceive(Context context, Intent intent) {
Bundle bundle = intent.getExtras();
Log.d(TAG, "[MyReceiver] onReceive - " + intent.getAction() + ", extras: " + printBundle(bundle));
if (JPushInterface.ACTION_REGISTRATION_ID.equals(intent.getAction())) {
String regId = bundle.getString(JPushInterface.EXTRA_REGISTRATION_ID);
Log.d(TAG, "[MyReceiver] 接收Registration Id : " + regId);
} else if (JPushInterface.ACTION_MESSAGE_RECEIVED.equals(intent.getAction())) {
Log.d(TAG, "[MyReceiver] 接收到推送下来的自定义消息: " + bundle.getString(JPushInterface.EXTRA_MESSAGE));
processCustomMessage(context, bundle);
} else if (JPushInterface.ACTION_NOTIFICATION_RECEIVED.equals(intent.getAction())) {
Log.d(TAG, "[MyReceiver] 接收到推送下来的通知");
int notifactionId = bundle.getInt(JPushInterface.EXTRA_NOTIFICATION_ID);
Log.d(TAG, "[MyReceiver] 接收到推送下来的通知的ID: " + notifactionId);
} else if (JPushInterface.ACTION_NOTIFICATION_OPENED.equals(intent.getAction())) {
Log.d(TAG, "[MyReceiver] 用户点击打开了通知");
Intent i = new Intent(context, TestActivity.class);
i.putExtras(bundle);
i.setFlags(Intent.FLAG_ACTIVITY_NEW_TASK | Intent.FLAG_ACTIVITY_CLEAR_TOP );
context.startActivity(i);
} else if (JPushInterface.ACTION_RICHPUSH_CALLBACK.equals(intent.getAction())) {
Log.d(TAG, "[MyReceiver] 用户收到到RICH PUSH CALLBACK: " + bundle.getString(JPushInterface.EXTRA_EXTRA));
} else if(JPushInterface.ACTION_CONNECTION_CHANGE.equals(intent.getAction())) {
boolean connected = intent.getBooleanExtra(JPushInterface.EXTRA_CONNECTION_CHANGE, false);
Log.w(TAG, "[MyReceiver]" + intent.getAction() +" connected state change to "+connected);
} else {
Log.d(TAG, "[MyReceiver] Unhandled intent - " + intent.getAction());
}
}
}
|
注:
极光后台下载的Demo里面的Activity都是集成的InstrumentedActivity,我们改成我们自己的BaseAcitivity即可。

